-40%
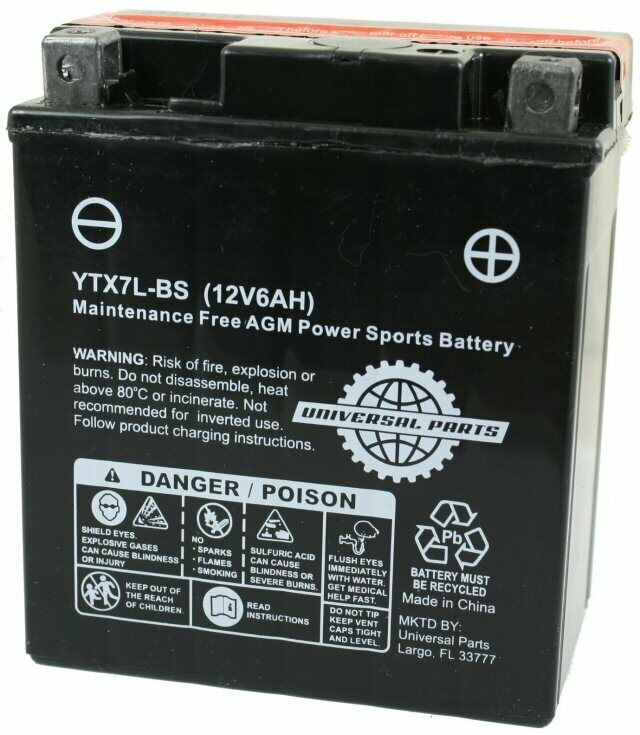
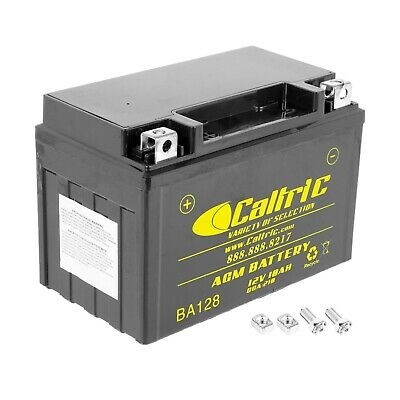
12V 6AH Battery YTX7L-BS
$ 18.47
- Description
- Size Guide
Description
To see all our shipping options make sure to click on the "Shipping and payments" tab.Item Description
Universal Parts 12 Volt 6 Amp YTX7L-BS Battery - Maintenance Free Dry AGM w/Acid Pack. Fits full-size scooters, mopeds, ATVs, dirt bikes, motorcycles, off-road vehicles and much more.
Replaces the Following Models: 44024, 31500-KW3-676AH, CBTX7L-BS, CTX7L-BS, FAYTX7L, GTX7L-BS, LT7-3, LTX7L-BS, M327BS, PTX7L-BS, UB7L-B, UTX7L
**Note: This product is a ORM-D (Other Regulated Item, Domestic) regulated item and ships via FedEx Ground to the lower 48 states only.
Length: 4.41 inches (112mm)
Width: 2.70 inches (69mm)
Height: 5.05 inches (128mm)
Includes Acid Pack
Set-Up Instructions
All AGM battery electrolyte containers are not the same. Each contains the proper amount of electrolyte for its specific battery. Before filling, read the electrolyte handling instructions and precautions on the label. Do not smoke when activating a battery or handling battery acid. Always wear plastic gloves and protective eye wear and be sure to read the Battery Safety section in this manual. The following seven steps should be used to activate an AGM battery:
1. The battery must be out of the vehicle and placed on a level surface.
2. Remove electrolyte container from the plastic storage bag. Remove the strip of caps. Put the strip aside as you will use it later to seal the battery cells. For battery filling use only the dedicated acid container that comes with the battery as it contains the proper amount of electrolyte for that specific battery. This is important to service life and battery performance. Do not pierce, or otherwise open the foil seals on the electrolyte container. Do not attempt to separate the individual electrolyte containers.
3. Place the electrolyte container with the foil seals facing down into the cell filler ports on the battery. Hold the container level and push down to break the foil seals. Electrolyte will start to flow into the battery and air bubbles will be seen inside the container. Do not tilt the electrolyte container.
4. Check the electrolyte flow. Keep the container in place until it empties completely. If no air bubbles are coming up from the filler ports, or if container cells haven’t emptied completely after 20 minutes, tap the container and/or battery case a few times to cause the electrolyte to flow into the battery. Do not remove the acid container from the battery until it is completely empty. The battery requires all of the electrolyte from the container for proper operation. Bubbles will appear as the electrolyte container fills the battery indicating the flow of battery acid. Tap the container periodically to keep the electrolyte flowing until the container is completely empty. Never puncture the top of the acid container to speed up the filling process.
5. Remove the empty electrolyte container from the battery. Fully insert the strip of sealing caps (previously removed from the electrolyte container) into the battery filling ports. Make sure the strip of caps is fully inserted and flush with the top of the battery. Insert the caps by hand, do not use a hammer or excessive force. Never remove the strip of caps or add water or electrolyte to the battery during its service life.
6. For batteries with ratings of less than 18 AH, let the battery stand for 20 to 60 minutes. For batteries with higher AH ratings allow the battery to stand for 1 to 2 hours. Universal Parts AGM batteries have the amp hour (AH) printed on the front of the battery case. The stand, or rest period, allows the electrolyte to permeate into the plates for optimum performance.
7. Newly activated AGM batteries require an initial charge. After adding electrolyte, a new battery is approximately 75-80% charged. After the “stand” period (step 6), charge the battery to bring it to a full state-of charge. The battery charger used for initial charging should be able to charge at 12.8+-volts for an AGM battery.
Fast order processing.
Important Parts Notice:
Not all replacement or upgrade parts come with instructions. It is the customer's responsibility to have common knowledge of installation or hire an experienced installer. We are not responsible for any damage that may be caused by any of the items we sell, whether installed by you or a professional. We are not required to provide step by step instructions or technical support. In any case, we will always do our best to help you with any technical question you may have.
Electrical parts are none returnable and buyer assumes all risks.
Important Notes
Address Change Request
Address change request will never be accepted. Please make sure you choose the correct shipping address before completing your order. If you need to change your address you will have to cancel the original order and place a new order with the correct shipping address.
International Buyers – Please Note:
Import duties, taxes, and charges are not included in the item price or shipping cost. These charges are the buyer's responsibility.
Please check with your country's customs office to determine what these additional costs will be prior to bidding or buying.
For more information regarding international shipping fees and eBay terms please
click here
Copyright © 2017 A to Z Parts Inc. All rights reserved.
